Tuesday, December 6, 2022

Twisted Tulips Help on Finishing and construction!!!

Darcy on Thanksgiving day!


Yoke

Tulip I used in sweater


Tulips for 2 more choices in the "twisted body and

sleeve.  Everything and how to work it is in the pattern.


Try it on at this point. Use 2 long

 cable needles or put a length of 

slippery purl cotton in stitches.

You can put the purl cotton in the 

hole of the needle and pull it through.  

the stitches. After joining

must be divisible by 24 +1. each "pie" 

will add about 3".  I had to actually

 decrease it a lot before the yoke 

on my first go. It fits perfectly now.  

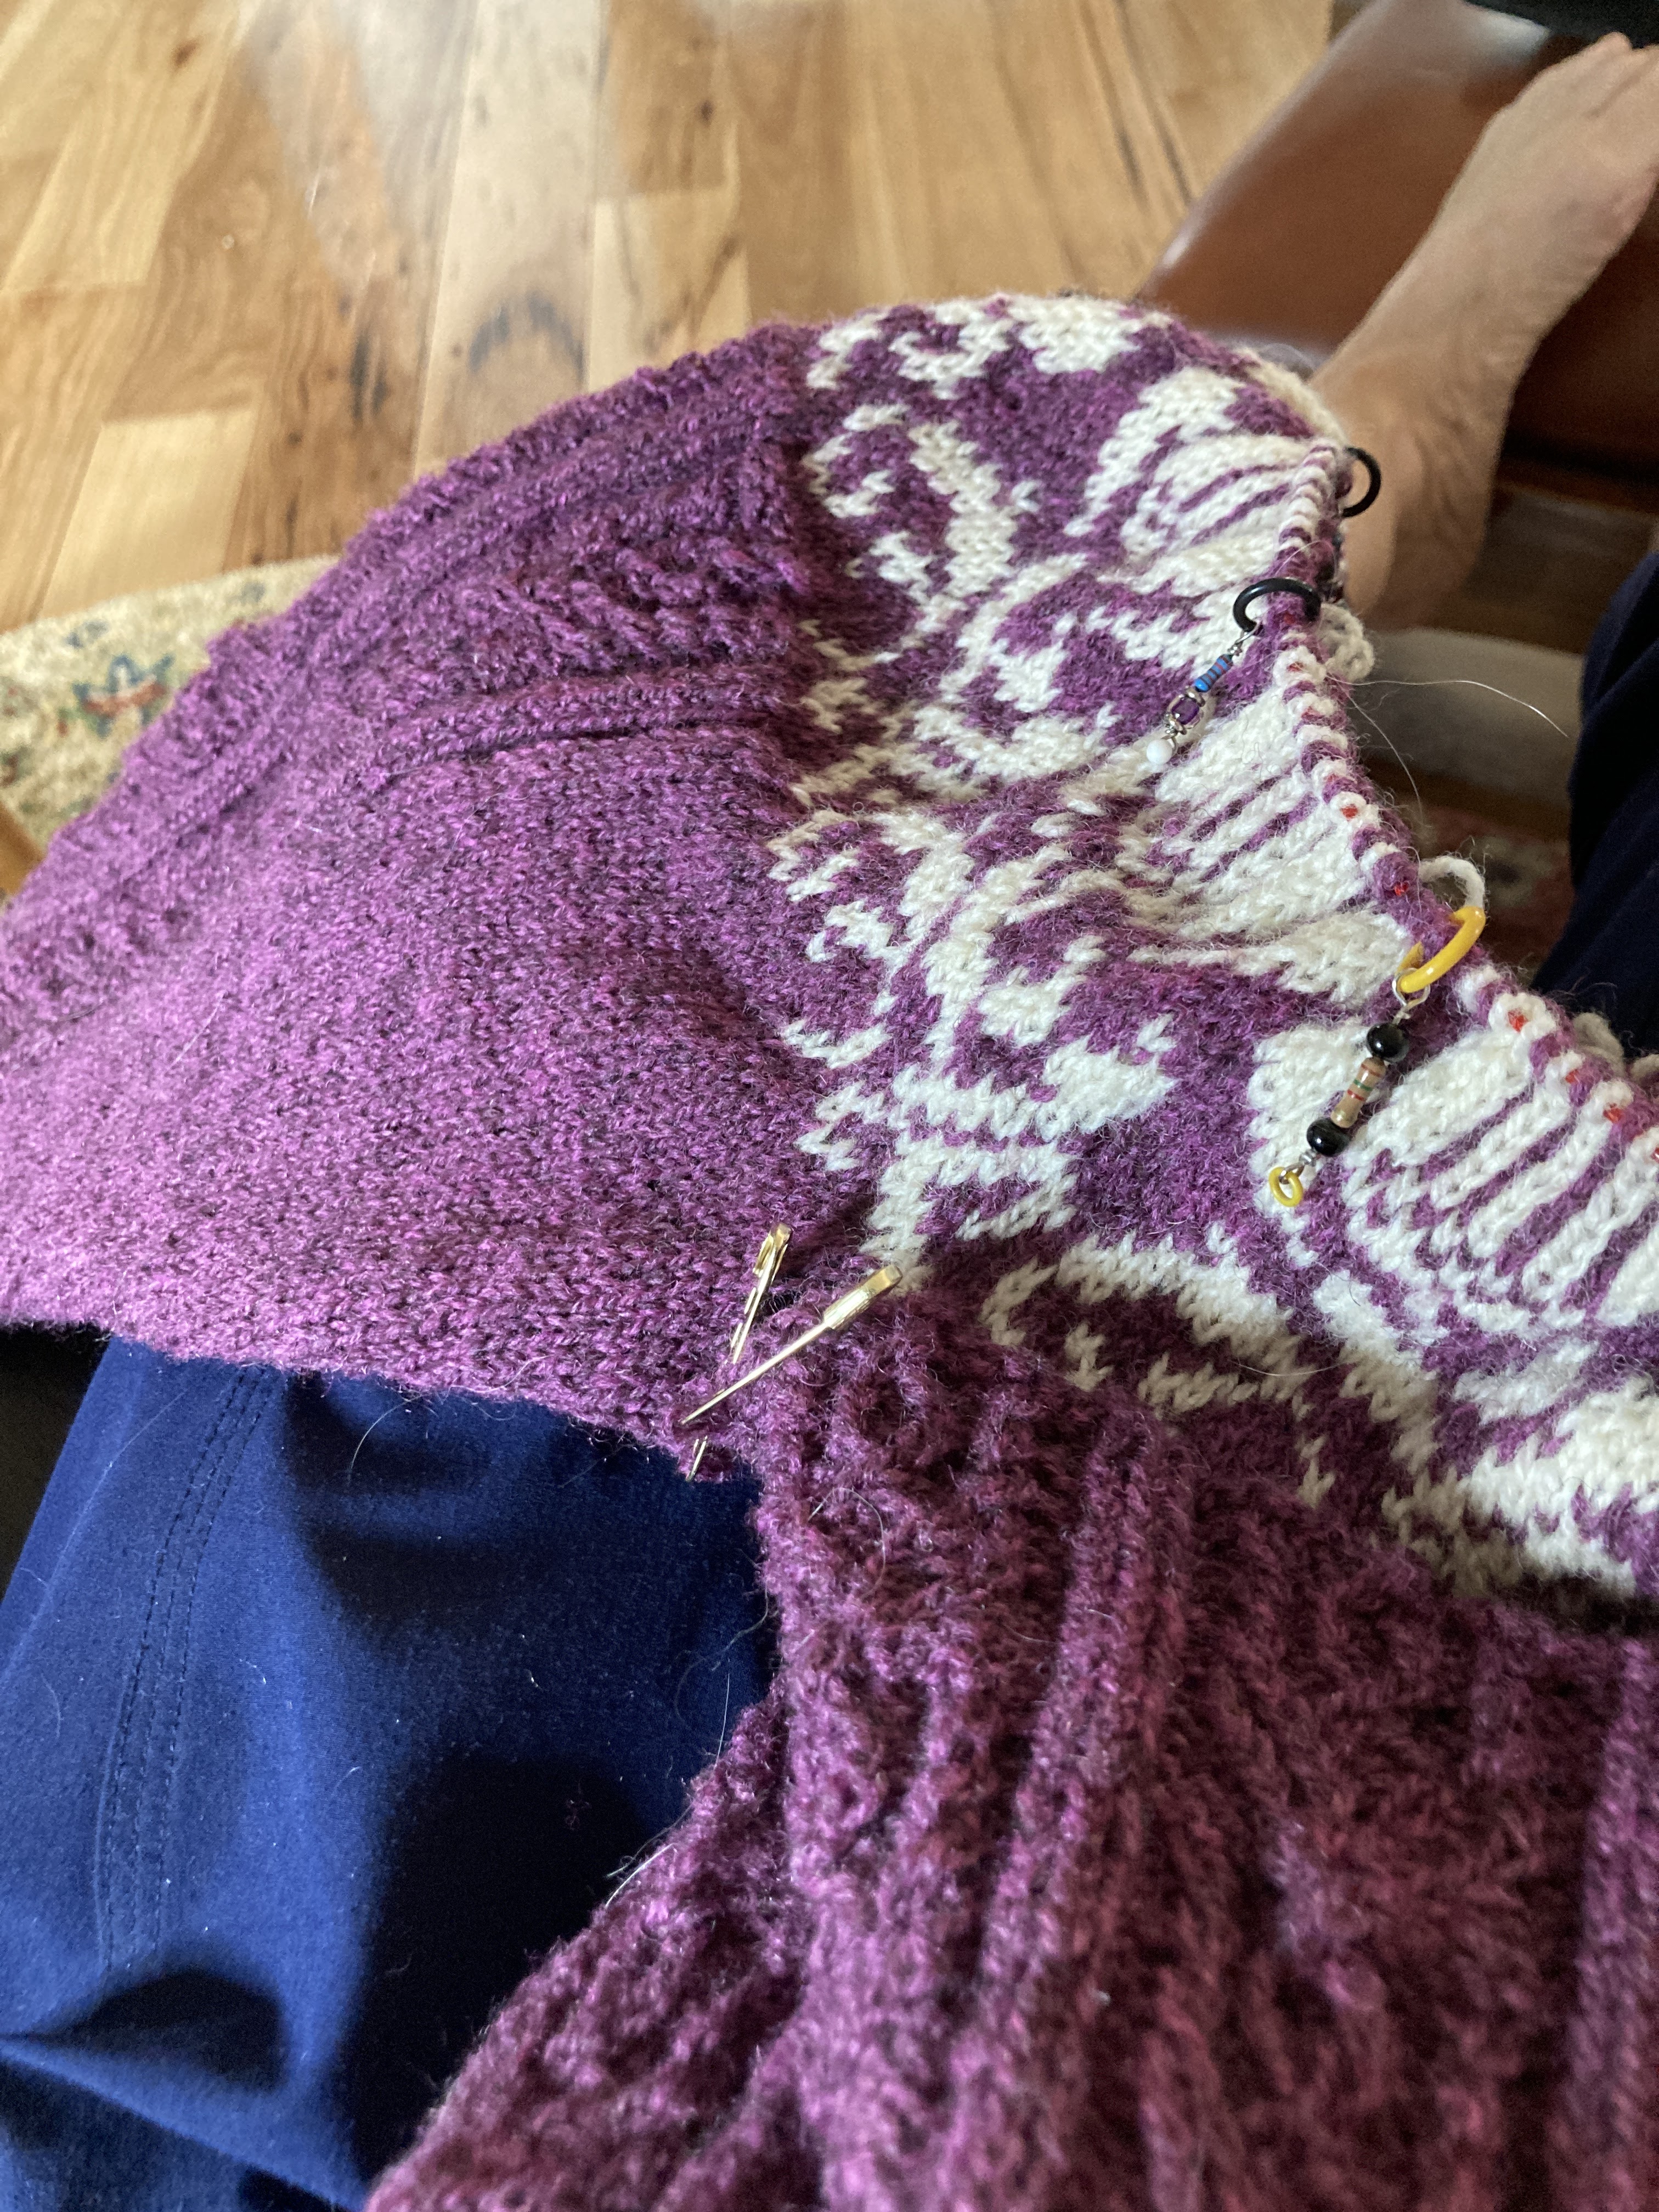
You can see the underarm stitches on safety pins that are to be kitchenered

together.


Sewing the steek. Tulip has stripes too!
Mark it well!


Darcy trying it on before I cut the steeks
and shaped the back neck with short rows
I washed it before I cut steeks to be sure both
sides matched!!!!

 
Front borders are set for clasps, but if you prefer
buttons just make buttonhole loops with yarn for the
fastening.
The back is so pretty it would make a great
pullover!  Just start the row under the arm
and work front same as back. Work the short
rows from the  center front! E mail me at cindy@norskneedlework.com for help!


Hold your hand under the scissors and
be sure not to snip yarn on the back. 
Easier than it looks!!! Make a sample
to cut!!!

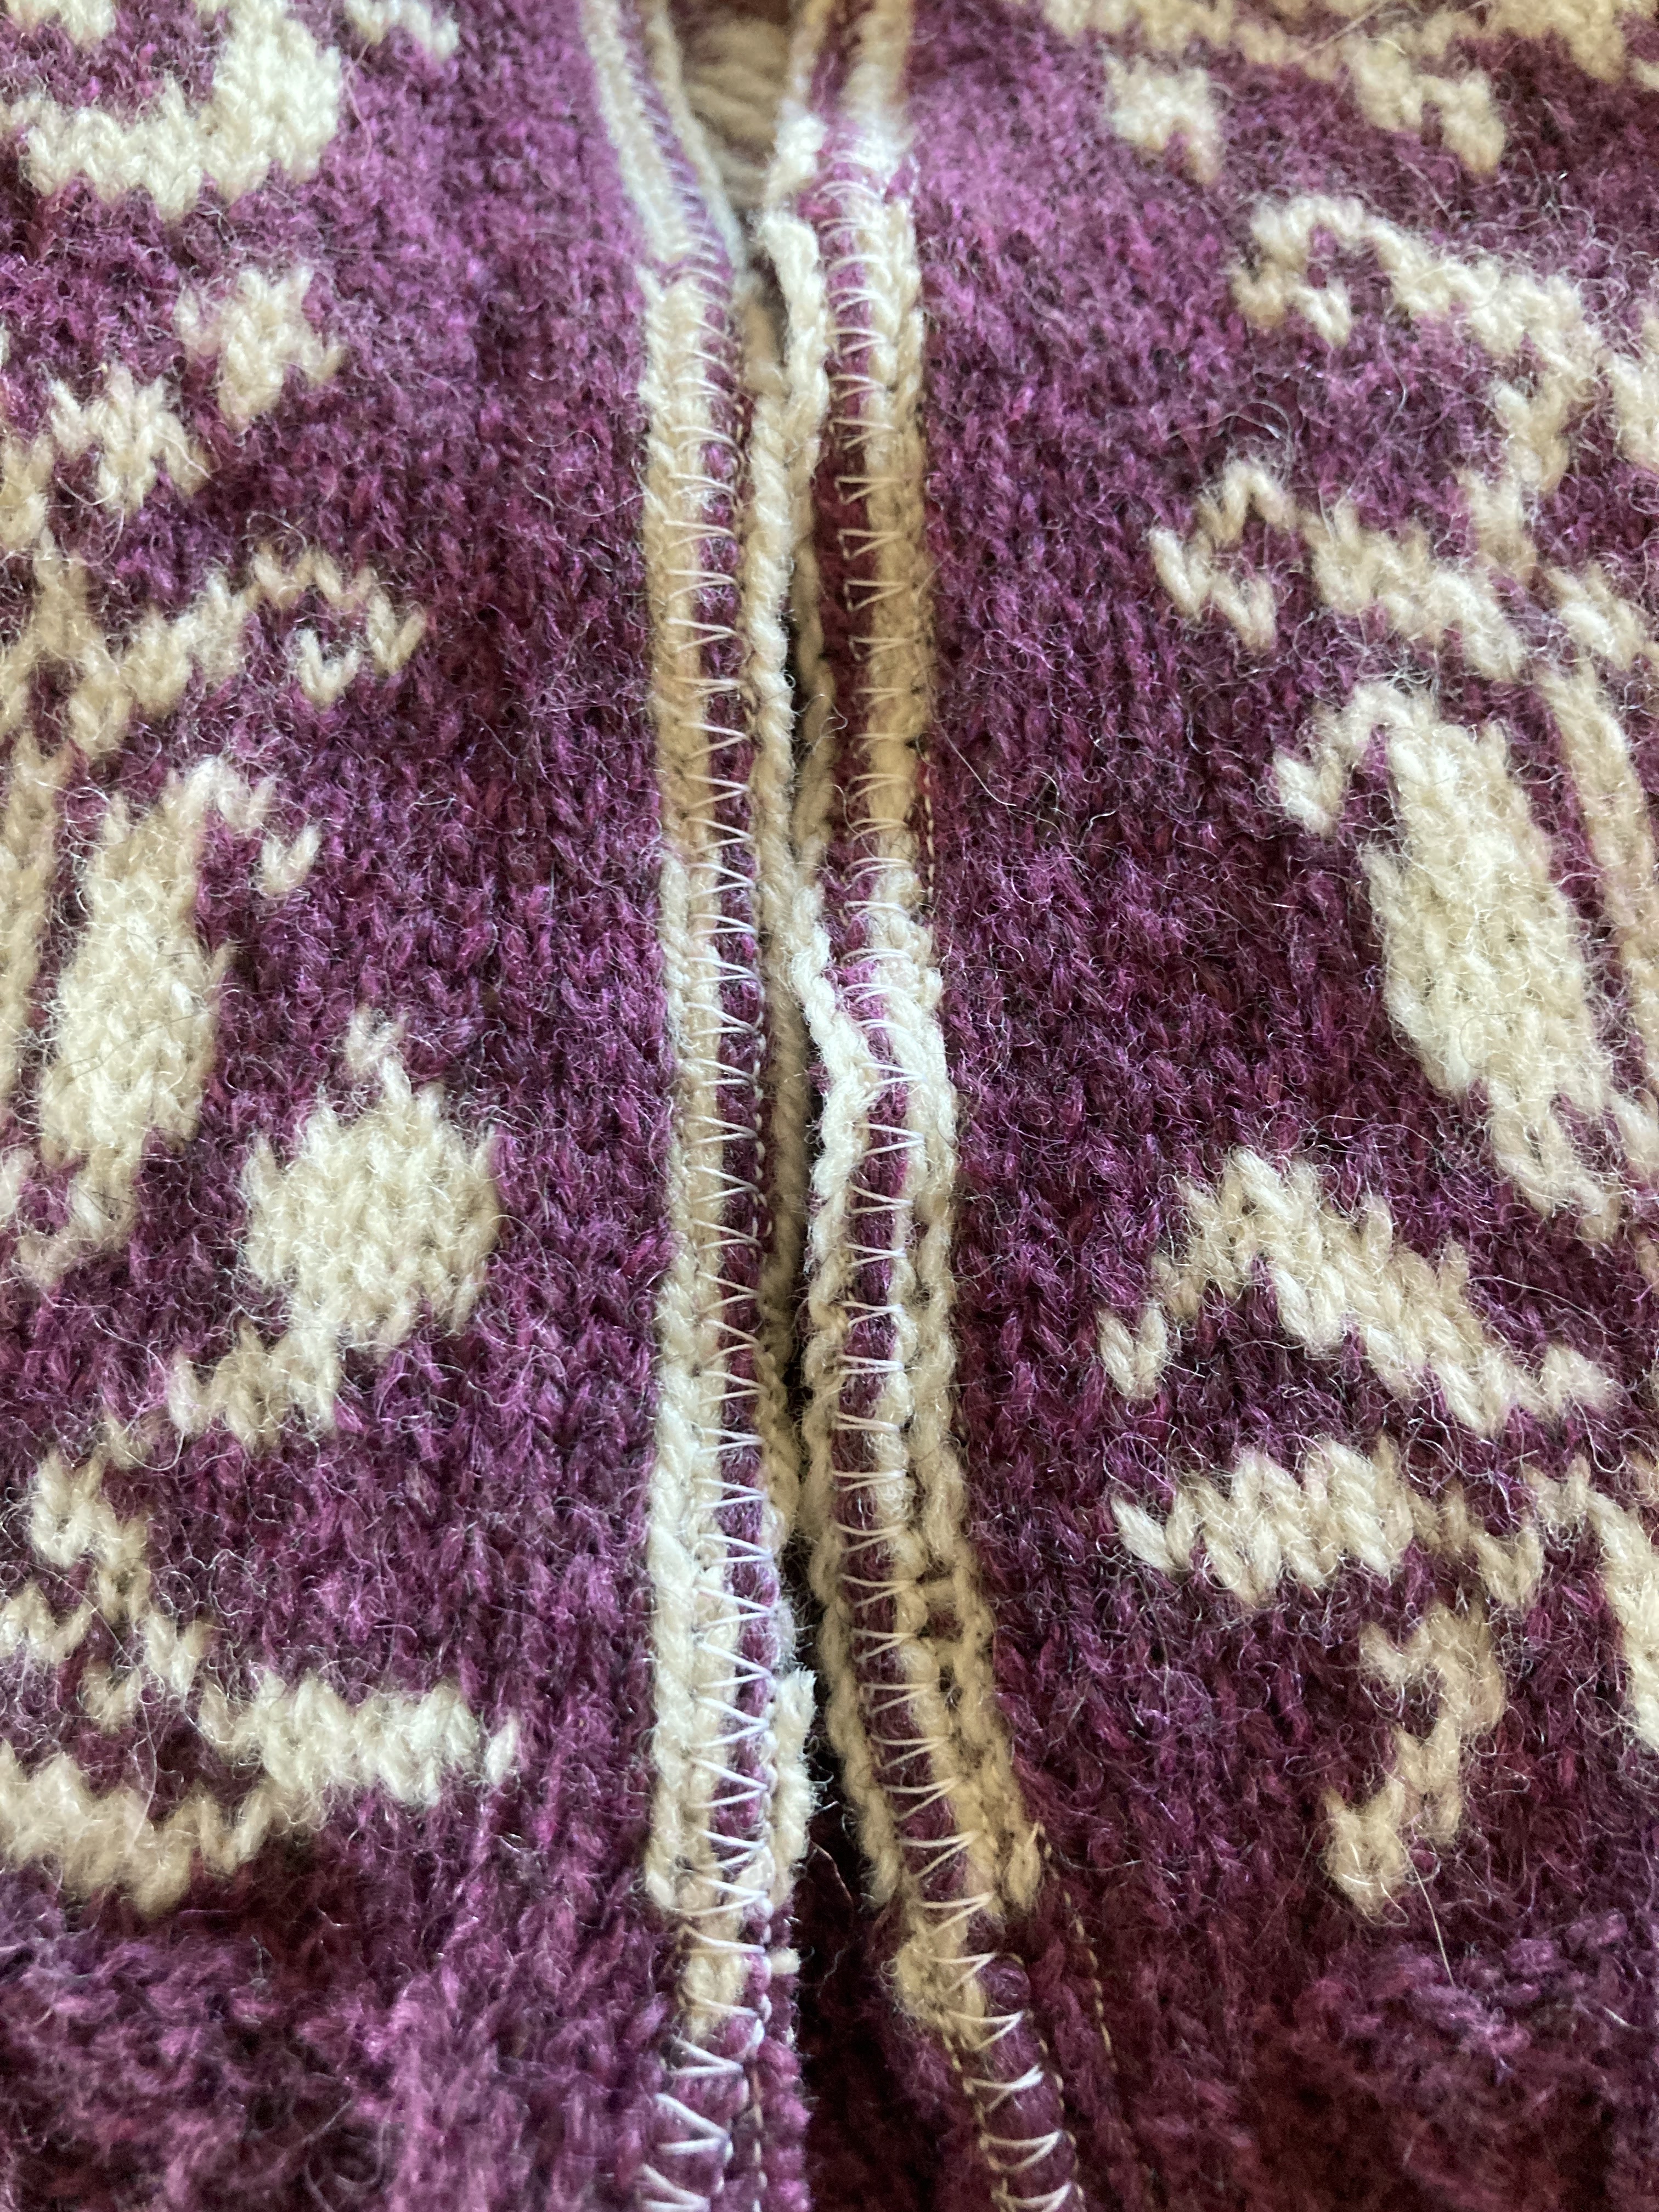
Steeks cut and zig zaged edges. Believe
me it will NOT come apart. Work sewing from
same direction= top to bottom


I picked up, from top to bottom both sides, 4 out of
5 stitches on smallest needle to knit front bands.
Work one row of K2 tog. YO  across, then work more rows of stockinet stitch.  Sewing it up is easy if you use the bar on the back between where you picked up the stitches. Then it won't skew to side.


Wear it and Enjoy!!!!


Saturday, January 22, 2022

Tips on Finishing your Odin's Creatures pullover


 Here is my gorgeous granddaughter in MY new sweater. I am keeping it.

I took lots of pictures along the way to help you knit it.  It is knit in the round with steeks at the front, and back neck and on the henley opening.

Back with Yggdrasil the tree of the
9 worlds.

Front has The horse Sleipnir  and the two wolves Geri and Freki


No steeks at the side but by carefully marking the side stitch you sew the middle stitch about 1/4" less than the width of the upper sleeve and sew it on with yarn along a garter ridge on the sleeve. Picture to follow.

I knit the neck in the round with a steek in the middle decreasing on both sides to match every row. Clearly marked on the pattern. No need to work back and forth and the way I knit the neck it makes it lovely rounded!

There are bindrunes all over this sweater. They are named on the pattern, all good ones like Spiritual health, Protection, Wolf, Horse and "A conspiracy of ravens"!! Who knew this is what a group of ravens are called. Huginn and Munin live on the upper sleeves.   There are a lot of charts and big so you can see them. Don't try to connect them around the body. I put the 3 lower front charts on the top of a magnet board and the 3 lower back charts below. It is easy to tell what row you are on by the pattern and the solid black lines every 10 rows.  You can number the lines if you wish. The top is easy to follow by watching where you are on the animals. You can see the rows done below the magnet strips and just move it every row. Don't move the charts, only when you need to flip the panels over and work on up.

The sleeve is charted the same way. If you can't understand this please write me at cindy@norskneedlework.com for help.
Increases are charted but you can change the lines to your desired size and length on the sleeve.
This is the steek mid front     You hold 3 sts on a holder
then cast on 9 sts which will be cut after sewing 4
rows of small machine stitching around the 3 center
stitches.  You can see the back stitching at the
bottom.  It is not scary.. Practice on the back neck!
Hold your hand under the steek and you won't cut through to the back

Some of us have a nice glass of wine after the cutting!  First measure, then sew then cut... Hope these pictures will help


You can see the center background 
stitch between front and back.  Sew  
the same 4 rows. I cut and then zig
zag the edge. All the stitching will 
be well hidden!


Seriously after you do a little it is easy.  I measure the width of the upper sleeve and sew around the 3 side center stitches. 4 rows of small stitching. Mark the depth well and down the center stitch  It is a great idea to use a different color thread so
you can see it.

Sew with the color of your garter ridge doing 
matress stitch on the body (keep it really straight
vertically)  Work into the garter bump on the
sleeve side.

This is from last years sweater but shows the arm
stitching better! You have to ease in stitches on the body size.


 Match the shoulder patterns exactly and do a 3 needle bind off from the inside.


  The neck is double and covers
the steeks.  This is my antique 
necklace hand stitched and 
bought in Germany when I 


Nice woven braid I stitched on to cover front steeks.